
Solution Pipelines in Power Platform


Overview

Pipelines in Power Platform allow you to deploy solutions and configuration settings to target environments. These pipelines handle not only the solution components but also environment-specific details like connections, connection references, and environment variables. Here are some key points about solution pipelines:

  1. Deployment Scope: Pipelines can deploy any Power Platform customization contained within your solution. However, they do not include data stored within Dataverse tables.

  2. Environment Requirements: To create a pipeline, you need at least two environments: a source environment (usually your development environment) and a target environment where you want to deploy your solution. Both environments must have a Microsoft Dataverse database.

  3. Managed Environments: The target environments used in a pipeline must be enabled as Managed Environments.

  4. Limitations:

    • Personal pipelines can’t be extended.
    • Only two environments (source and target) can be configured for a personal pipeline.
    • Personal pipelines can’t be shared with other users.

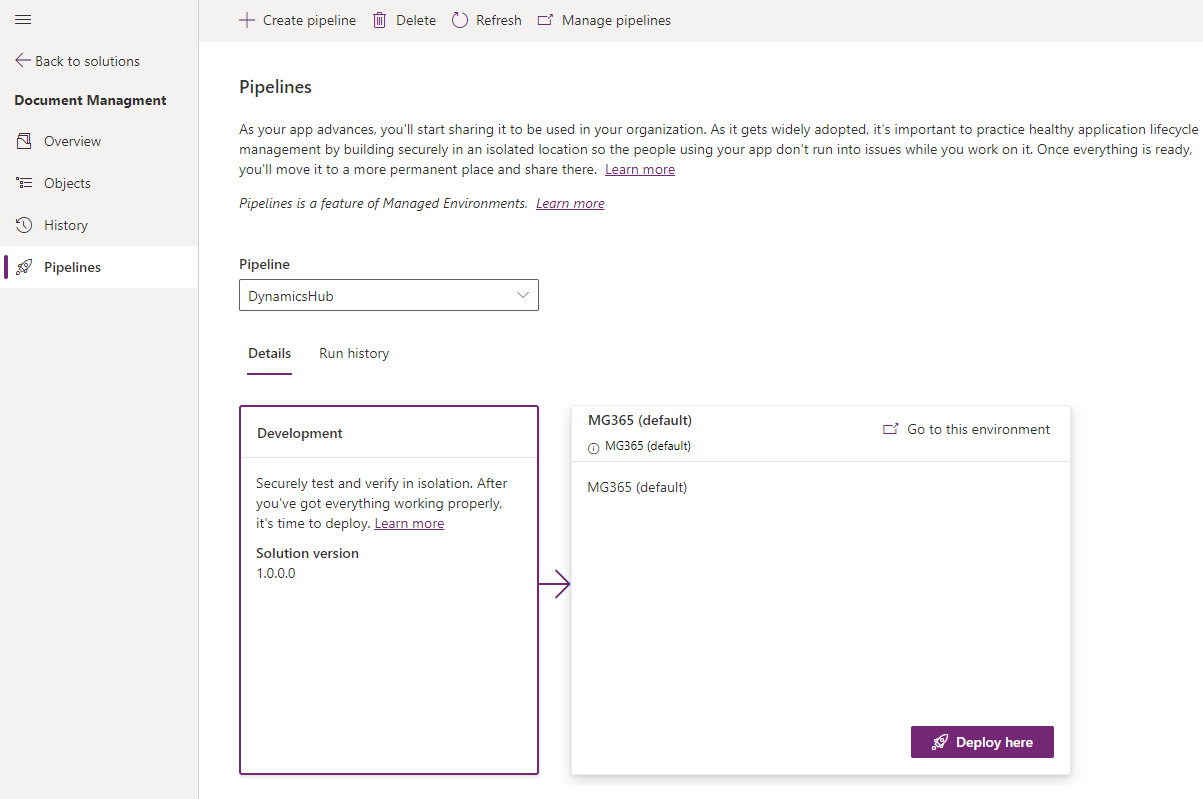
Setting Up Pipelines
  1. Navigate to your Solution/Pipelines
  2. Create pipeline


  3. Define Name of your pipeline and Description


  4. Once the pipeline has been created, select from dropdown


  5. Deploy


  6. Here you can pick 
    1. Now for immediate deployment 
    2. Later for scheduled deployment
  7. Here it will validate the solution with the target environment, if there are any dependencies they will be displayed here 
  8. Once validation has been completed the pipeline will analize the solution components and generate Deployment Notes


  9. Once you click Deploy, the pipeline will deploy the solution to the target environment
  10. The Pipeline is rich with information, its worth the time to open the record and look around you might find valuable information and analytics


Comments

Popular posts from this blog

Azure DevOps Fork Repos between two Organization

  Azure DevOps Fork Repos between two Organization This weekend I embarked on a topic a bit foreign to myself, on the surface seemed a bit simple. The idea is to fork my Azure DevOps Repo to a different organization and push changes between them. Bad news DevOps doesn’t allow to fork Repos to a different organization, you have only the capability to fork to a different Projects within the same Organization. I’m pretty much sure there are so many other ways to solve this issue, but this is the one that I found to be easy to implement. Import Repo to the new Organization Remember here you have to generate a personal token to be able to import the Repo you have to be a member of the new organization as well This might take a few minutes depending on the size of your project, once its complete you will receive a confirmation email, or just refresh it after few minutes So far all looks good, you can clone the solution in your new Organization,

Power Platform Tool for Visual Studio 2019/2022

 Power Platform Tool for Visual Studio 2019/2022 We have a new Visual Studio Extension Power Platform Tool.  Creation and deployment of Plugins, Custom Workflows and WebResources is going to be easy and time saving.  This article is going to focus on how to connect to your environment and create your Visual Studio Solution. In a subsequent article I will try to cover on how to Create and deploy your components to your environment. Installation is straight forward go to      Tools→ Manage Extensions→ Search for Power Platform Tools     You will Need Visual Studio 2019 or later version     Subsciption to Pawer App/Dataverse or trial       .Net Framework 4.6.2 Now we will go over how to create a Project and connect it to your Environment Open Visual Studio 2019 →New Project Search for Power Platform Solution Template Add Project Name and Location → Create Click on Start from Dataverse to connect to your environment Enter the following and → Login

How to use Formatted Values in Power Automate Flow Dynamics 365

  How to use Formatted Values in Power Automate Flow Dynamics 365   If you have been working on Power Automate for Dynamics 365 you might have been wandering how you can access a lookup Formatted Value or Option Set formatted values. You can use the following format to access: body(‘{Action Name}’)?[‘{fieldname} @OData.Community.Display.V1. FormattedValue’] You just have to be mindful in Dynamics 365 lookup field name they do not translate to the proper field name, you might have to and an “_” as a prefix and “_value” as a postfix, I will leave that to you.